How do I use labels on tickets?
On a ticket, click Labels (or press L), tick a label or type a new name. Rename, recolour or delete labels in Settings › Tickets.
Labels sort tickets by topic, like Warranty or Billing, each in its own colour. On a ticket, click Labels (or press L) and tick one, or type a new name to make it. Every team shares one list of labels.
Also called: tag, category, label colour, étiquette, catégorie, tag de billet
Step 1: Put a label on a ticket
Open the ticket. Beside Labels on the right, click the labels (or Add a label), or press L. Tick the labels you want; tick again to take one off. Type in Find or make a label to find one fast.
Click: a ticket › Labels
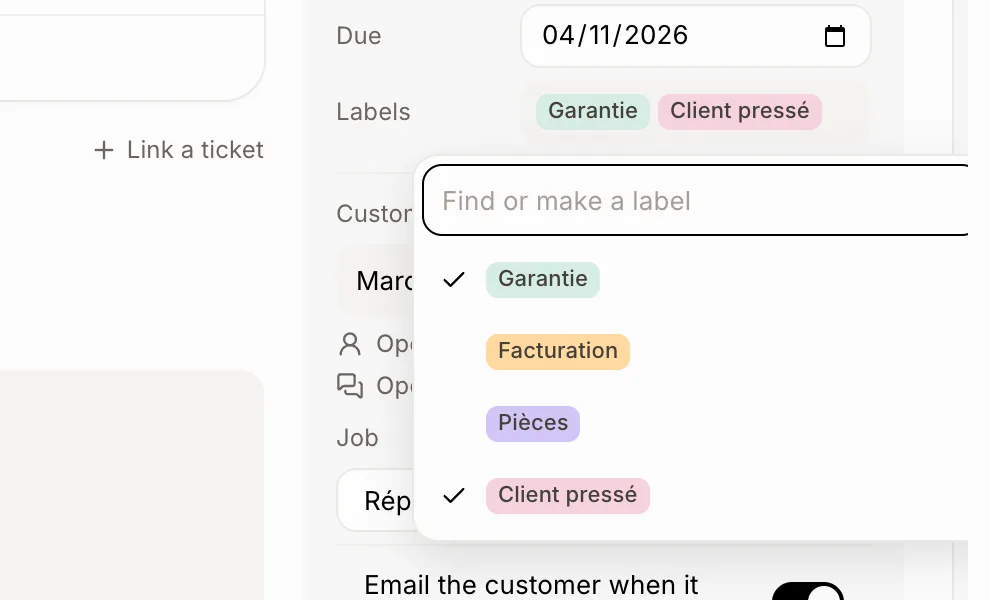
Step 2: Make a new label
Type its name in Find or make a label and click New label "…" (or press Enter). It gets a colour of its own and goes on the ticket.
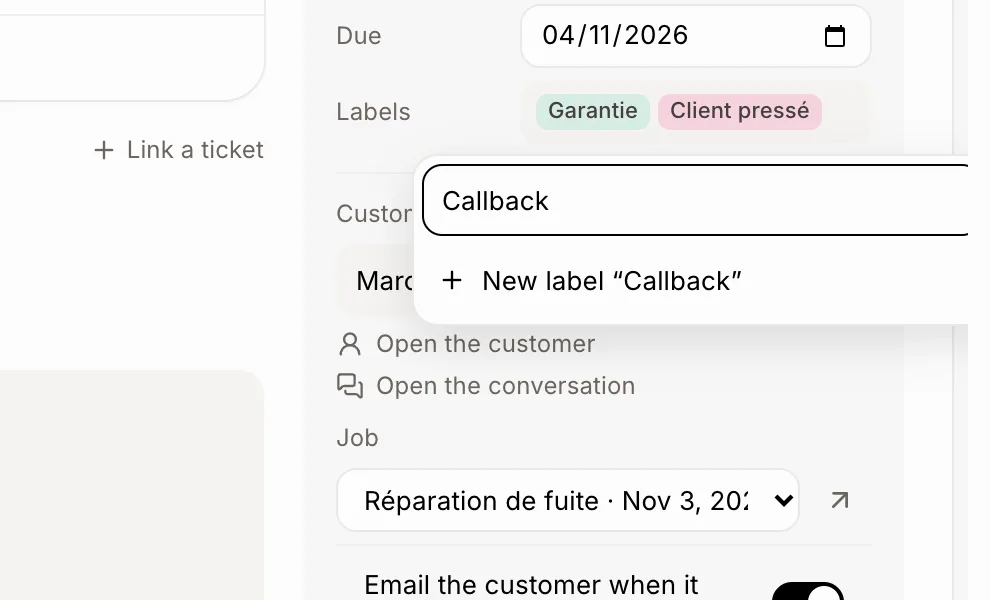
Step 3: Rename, recolour or delete
Go to Settings › Tickets › Labels. Change a name and click away to save it. Click a colour to change it. The change shows on every ticket that has the label. The bin deletes a label and takes it off every ticket.
Click: Settings › Tickets › Labels
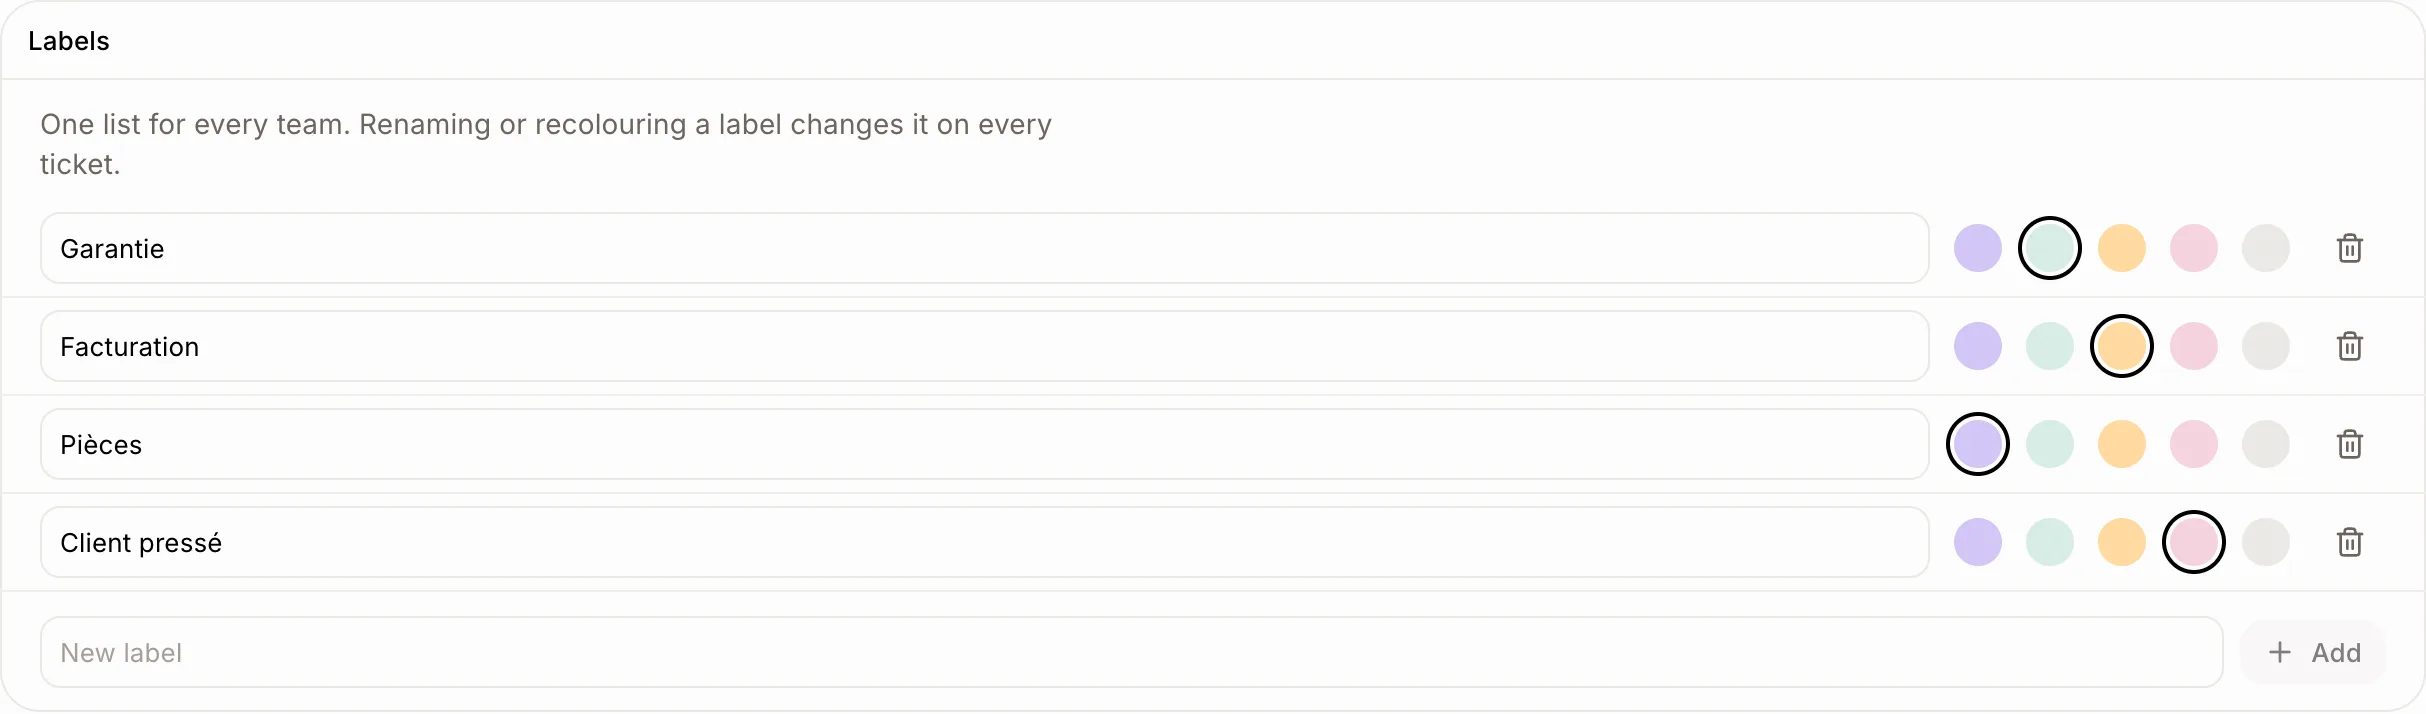
Good to know
"Garantie" and "garantie" are the same label: case and accents don't count.
A ticket can have up to 20 labels.
On the list, Filter › Labels shows the tickets with a label.
You can ask Ask Sam: "put the Warranty label on SUP-12" or "make the Billing label yellow".
If it doesn't work
"Another label has that name." Pick another name, or use the label that already has it.
"You have the most labels there can be. Delete one first." Delete a label you no longer use.
No bin in Labels? Deleting a label needs access to Settings.